Monday, March 30, 2015

Plant Dahlia Tubers

These flashy, colorful jewels can become an essential feature of the mid- to late-summer border, as well as inject life into tired fall gardens.

Plant the Tubers

Once the danger of frost has passed, dig a hole 12 inches deep and add a layer of organic matter in the bottom. Place the tuber in the hole with the buds pointing up, as well as a stake for support, and carefully refill with soil.

Planting Tuber

Pinch Out Shoot Tips

Provide slug protection as young growth appears. When stems are 12 inches high, pinch out the top bud to encourage bushiness and lots of flowers.

Pinch Out Top Bud To Encourage Flowers

Frost Protection

As soon as the first light frost has blackened the leaves, cut off the foliage and dig up the tubers. Place them somewhere airy and frost free, so the stems can dry out fully.

Newly Dug Tubers

Storing

When dry, brush the soil off the tubers, label them clearly and plant them in wooden boxes or large pots of dry potting mix. Keep them in a cool, dry, frost-free place until you can plant them out again the following spring.

Store Tubers Until Spring

Sunday, March 15, 2015

The Best Cold-Tolerant Veggies

Broccoli

Famous for being packed with nutrients, broccoli is tasty and easy to grow. Like the other plants you'll see in this slideshow, the plant is quite frost tolerant. Plant it about a month before your area's average last spring frost date. Because broccoli loves cool weather, you can also plant it in late summer for fall harvests.

Here's a hint: If you keep many of the leaves on the plant after harvesting your broccoli, the plants should produce sideshoots that'll give you a second or even third crop.

Broccoli

Cabbage

Cabbages can be as ornamental as they are edible. There are many different types; pick varieties called early cabbage (such as 'Earliana') for spring harvests. Late cabbage varieties (such as 'Vantage Point') are better for planting in midsummer and harvesting in fall.

Here's a hint: Add color to your vegetable garden with red-leaf cabbage varieties such as 'Ruby Ball' or 'Super Red'.

Cabbage

Calendula

Add a touch of beauty to spring and fall vegetable gardens with edible flowers. Calendula is a favorite for its cheery cream, yellow, or orange daisy-like blooms. Use the petals, which have a zingy, peppery flavor, to add color and interest to salads and cream-based soups.

Here's a hint: Calendula also dries well, making it a good pick for garden craft projects.

Calendula

Carrot

Enjoy tasty carrots spring, summer, and fall. While you won't have big, long roots in spring, smaller selections such as 'Thumbelina' are perfect for early planting. Harvest carrots as soon as the roots are large enough to eat.

Here's a hint: Carrots get sweeter as the temperature cools. Pile mulch over the roots to keep the soil from freezing and harvest them through late fall and early winter.

Carrot

Chives

Begin harvesting this perennial herb as soon as its new leaves appear in spring. The foliage has the classic chives flavor, but the late-spring blooms are edible, too, and taste more of onion.

Here's a hint: Pick off faded blooms if you don't harvest them. Chives can self-seed prolifically in the garden.

Chives

Lettuce

One of the vegetable garden's most versatile plants, lettuce comes in an amazing array of colors, shapes, and tastes. Plant a few seeds every week and you'll have a constant crop for fresh salads.

Here's a hint: Planting lettuce in a shady spot in the summer months keeps the plant cool, so you can harvest into the hot months.

Lettuce

Pansy

Pansies grace spring and fall gardens with their cheery, edible blooms. The flowers appear in virtually every shade of the rainbow and make wonderful decorations when used on desserts.

Here's a hint: Fall-planted pansies in cold-winter areas will often overwinter and bloom the following spring.

Pansy

Peas

Peas are perfect to grow on a little fence or tepee to give structure to the cool-season garden. They're pretty, too: The plants often bear variegated foliage and white flowers.

Here's a hint: If you don't have a spot to put up a fence or tepee, look for upright pea varieties that don't need a support to climb on.

Peas

Radish

Radishes win the prize for being one of the fastest vegetables; it's often ready for harvest less than a month after you plant the seeds. Radishes come in a variety of flesh colors, from white to red to pink and lavender.

Here's a hint: Because of their fast growth and small size, round-root radish varieties are good picks for growing in containers. After you harvest the radishes, grow summer vegetables or flowers in their place.

Radish

Swiss Chard

This may be the prettiest vegetable you can grow. Swiss chard offers glossy green heart- or arrow-shape leaves carried on colorful purple, pink, red, gold, orange, or white stalks. The leaves taste a bit like spinach.

Here's a hint: Some varieties of Swiss chard are more tolerant of frost than others. Take care not to plant this vegetable too early in spring.

Swiss Chard

Spinach

A so-called "super food" because it's packed with nutrients, spinach is a cinch to grow. Like other leafy greens, plant some in a shaded spot to keep harvests going into the summer months.

Here's a hint: In mild-winter areas, you can sow spinach in late fall for early spring harvests.

Spinach

Top Heirloom Tomatoes

What is an heirloom tomato? Many gardeners have heard the term but don't really know what it means. Happily, it's an easy definition: a variety that has been passed down from gardener to gardener. Unlike modern hybrid varieties, heirloom tomatoes come true from seed, making them easy to share.

The main reason to choose heirloom tomato varieties is the flavor. There's no one taste; you'll find a wide range of flavors in the heirloom-tomato world. But many of these varieties are prized for having an old-time taste -- they're a far cry from tomatoes at the grocery store, or even from many modern hybrids like 'Better Boy' or 'Early Girl'.


Tomato 'Brandywine'

Perhaps the most famous heirloom tomato, 'Brandywine' is a classic strain that many experts rank as the best-tasting tomato around. It features large red fruits, to 2 pounds each and dates to the late 1800s. 'Brandywine' is an indeterminate variety (meaning it continues to grow after it begins producing fruit), and its fruit ripens about 85 days from transplanting.

Heirloom Tomato Tip: Heirloom tomatoes aren't necessarily organic. Organic means growing plants without the aid of synthetic fertilizers, herbicides, etc. Many gardeners prefer to grow their tomatoes organically, but not all organic tomatoes are heirloom, and not all heirloom tomatoes are grown organically.

Tomato 'Brandywine'

Tomato 'Gold Rush Currant'

Heirloom tomatoes come in a wide variety of shapes, colors, and sizes -- there's an heirloom tomato for every space. 'Gold Rush Currant' is a delightful little one that offers lots of small but very sweet yellow-orange fruits in clusters. It's an indeterminate variety, and its fruit ripens about 80 days from transplanting.

Test Garden Tip: Many yellow tomatoes have a sweeter taste than their red counterparts.

Tomato 'Gold Rush Currant'

Tomato 'Cuban Yellow Grape'

An old variety from Cuba, 'Cuban Yellow Grape' produces fruit like you'd expect from the name: clusters of small, yellow grape-type tomatoes. It's a vigorous, indeterminate variety that grows tall and produces very sweet fruits. The fruit ripens about 90 days from transplanting.

Test Garden Tip: All heirloom tomatoes grow best in a spot that has full sun (at least six to eight hours of sun per day) and moist, well-drained soil rich in organic matter, such as compost.

Tomato 'Cuban Yellow Grape'

Tomato 'Super Snow White'

A large cherry tomato that keeps producing and producing and producing, 'Super Snow White' bears clusters of pale yellow fruits that resist cracking and are known for their exceptionally sweet flavor. It is an indeterminate variety that ripens about 75 days from transplanting.

Test Garden Tip: Most heirloom tomatoes grow well in large containers, making them perfect plants to grow on a sunny deck or balcony. In fact, growing them in containers can help reduce instances of disease.

Tomato 'Super Snow White'

Tomato 'Galinas'

A Russian heirloom, 'Galinas' produces tons of golden-yellow fruits in clusters. It's known for its productive nature, and the fruit has a very sweet flavor. An indeterminate variety, 'Galinas' can grow 6 feet tall. The fruit ripens about 75 days from transplanting.

Test Garden Tip: There are two main categories of tomato growth habit: determinate and indeterminate. Determinate tomatoes stay smaller and compact because their growth slows after they begin producing fruits; indeterminate varieties keep putting on new growth after they start bearing tomatoes.

Tomato 'Galinas'

Tomato 'Beam's Yellow Pear'

A variety from the early 1800s, 'Beam's Yellow Pear' has loads of long, pear-shape, golden-yellow fruits. Like many small-fruit tomatoes, it's perfect for snacking and has a sweet flavor. It's a vigorous, indeterminate plant, and fruits ripen about 70 days from transplanting.

Tomato 'Beam's Yellow Pear'

Tomato 'Golden Jubilee'

An award-winning tomato from 1943, 'Golden Jubilee' offers 3-inch-wide, juicy golden-yellow fruits that are quite sweet. It's an indeterminate plant, and the fruits ripen about 70 days from transplanting.

Test Garden Tip: Heirloom tomatoes typically weren't bred for good disease resistance. To help your plants stay healthy, pick off affected leaves as soon as you see them. Throw the diseased foliage in the trash, not your compost bin.

Tomato 'Golden Jubilee'

Tomato 'Goldie'

A big, yellow heirloom beefsteak-type tomato with fruits that can reach a pound, 'Goldie' features a sweet flavor and ripens about 90 days from transplanting. It's an indeterminate variety.

Tomato 'Goldie'

Tomato 'Rosalita'

A grape-type tomato, 'Rosalita' features clusters of small, sweet-tasting, pinkish-red fruits in abundance. It's an indeterminate grower, and the fruits ripen about 60 days from transplanting (making it a great choice for gardeners in northern areas).

Test Garden Tip: Many heirloom tomatoes are susceptible to cracking open on the vine. Avoid this problem by keeping the soil evenly moist and using an organic slow-release fertilizer.

Tomato 'Rosalita'

Tomato 'Speckled Roman'

As beautiful as it is tasty, 'Speckled Roman' bears 5- to 6-inch-long paste-type red fruits that are playfully striped with orange and yellow. It's an indeterminate grower, and the fruits ripen about 85 days from transplanting.

Tomato 'Speckled Roman'

Tomato 'Costoluto Genovese'

This heirloom tomato really stands out from the crowd! 'Costoluto Genovese' is an Italian heirloom that offers deep red fruits that are heavily ribbed. It's a fantastic sauce tomato with a very rich flavor. It's an indeterminate grower, and the fruits ripen about 78 days from transplanting.

Tomato 'Costoluto Genovese'

Tomato 'Moskvich'

Known for its tolerance to cold weather, this Russian heirloom ripens early, producing 5-ounce round, red fruits about 60 days from transplanting. It has a very rich flavor, especially considering it's an early variety. 'Moskvich' tomato is an indeterminate grower.

Tomato 'Moskvich'

Tomato 'Black Cherry'

They're not actually black in color (more like dark purple-red), but 'Black Cherry' tomatoes have a complex flavor that's a little more savory (and less sweet) than the average tomato. It's a quick indeterminate grower that produces tons of fruit through the season. The fruits take about 65 days to ripen.

Tomato 'Black Cherry'

Tomato 'Green Zebra'

While it's not an old-time variety, 'Green Zebra' is an open-pollinated tomato that's good for collecting and saving seeds. It's pretty distinct; the golf-ball-size fruits are gold with bold green stripes. It has a great flavor and is often ranked as one of the top-tasting heirlooms. 'Green Zebra' is an indeterminate variety, and the fruits ripen 80 days from transplanting.

Tomato 'Green Zebra'

Tips for Growing Better Tomatoes

How to Grow Bigger, Better Tasting Tomatoes


Tips for Growing Tomatoes

Learning how to grow bigger, better tomatoes... Whether you are a beginner at growing vegetables or a Master Gardener, these tips for growing tomatoes will help you increase your yield and produce better tasting tomatoes.

Seed packets and plant packs tell you how to plant tomato plants but they do not tell you how to care for them properly. Nor do they provide you with tips for growing tomatoes that have been discovered by experienced gardeners for hundreds of years.

Many gardeners search for tips for growing tomatoes because their plants do not produce high yields as they assumed they would. The main problem is usually caused by improper growing techniques. These tips will help you to grow bigger, better tasting tomatoes in no time.

Create a Stronger Root System by Planting Your Tomatoes Deeper

Growing Tomatoes Tip #1

When planting tomato plants you should always plant them as deep as you can without any leaves touching the ground. By burying the plant deeper, the stem will have more contact with the soil and produce more roots.

The increased root system will help increase the moisture content by having more roots to take in more water. The larger root system also helps the plant 'anchor' into the ground preventing it from bending over and being damaged by storms and high winds.

Prune the Bottom Leaves to Encourage Growth and Prevent Diseases

Growing Tomatoes Tip #2

After your tomato plants become well established remove the lower leaves to promote new growth at the top. The lower leaves will be shaded out by the upper portion of the plant and therefor render them useless since they will not be getting enough sun to actually produce photosynthesis.

Once your tomato plants reaches two feet high remove all of the leaves on the bottom half of the plant. Use snips or pruning shears to prevent damage to the stalk. Removing these leaves will also prevent soil born diseases by preventing the leaves and stems from touching the soil.

Pinch Suckers to Produce Increase Tomato Yields

Growing Tomatoes Tip #3

Suckers are the stems that grow between the stalk and a mature stem. On mature plants that are over 3 feet high they should be pinched out as soon as they begin to develop since they will not produce fruit, cause over crowing and will cause increased shading. The increased shading will decrease photosynthesizing and reduce production and quality of taste.

Some tomato growers do not prune suckers. It is not required but do know that doing so will allow more energy to the main portion of the plant, more sugars to the tomatoes, and better shape.

How to Prune Tomatoes

Plant type

There are three major categories of plant growth types:

Indeterminate:  Indeterminate tomato plants continue to grow, limited only by the length of the season. These plants produce stems, leaves, and fruit as long as they are alive.  These plants perform best if staked and pruned.  Some indeterminate varieties are:  Early Girl, Big Beef, Sweet Cluster, New Girl, Money Maker, Len's Prize, Lemon boy, Joan's Roma, Sun Sugar, Sweet Baby Girl, and most "heritage" varieties.

Determinate:  Determinate tomato plants have a predetermined number of stems, leaves, and flowers hardwired into their genetic structure.  The major advantage of planting determinate plants in a home garden is early harvest.  These plants do not have to be pruned but perform better if the lower suckers are removed and have some support to keep them off the ground.  Some determinate varieties are: Bush Beefsteak, Polfast, Fantastic, Lunch Box, Oregon Spring, and most Roma types.

Bush or Dwarf:  These plants are best for growing in containers.  Most of the fruit is formed on sucker growth so these plants should not be pruned.  Some bush or dwarf varieties are:  Tumbler, Patio, Totem, Gold Nugget and Red Alert.

Alternative Gardning: How to Prune Tomatoes

With tomatoes, we want to maximize the efficiency of photosynthesis and minimize the risk of disease. This is best accomplished by ensuring that each leaf has plenty of room and is supported up off the ground.  Pruning methods vary with the plant type.

Indeterminate:  Remove all suckers as they appear.  In the diagram below, the sucker is the branch that appears between the  main stem and the leaf.  It is much easier to remove these suckers when they are small.  Be careful not to remove main growing tip at the top of the plant.  Once fruit starts to form, we remove all leaves below the fruit for ease of picking and to allow air circulation around the plant.  The next picture below shows some pruned Joan's Roma plants in mid August with all the lower branches removed.  We do not top the plants until early to mid September unless the plant is so tall the fruit is beyond our reach.  Remove all dead or diseased leaves and discard away from the area. Ideally, there shouldn't be all those weeds growing but this just shows that you don't have to be perfect to grow good tomatoes!

Pruning tomatoes

Joan's Roma

Determinate:  Determinate plants can be just left with no pruning but the quality of the fruit and the health of the plant will benefit from some care.  The most important thing is to get the plants off the ground by using a cage or some other support.  Most of the pruning is done after the first flower cluster appears.  We remove the lower suckers up to the one below the lowest flower and then leave it alone except for removing any branches that start to touch the ground.  As with the indeterminate plants, if there are any dead or dying leaves, we remove them and discard them away from the tomato patch.

Bush or Dwarf plants:  Do not prune!  The leaves from the original part of the plant start to curl as they get older and will turn yellow and die eventually.  We usually remove the curled leaves if they become too unsightly and clear any dead growth from around the plant.

Saturday, March 14, 2015

When to grow

Very informative on when to sow your plants.....

when to grow

Cucumber Growing Tips

growing cucumbers

Here are a few tips for growing cucumbers:

Cucumber sex. Cucumbers are either monoecious or gynecious. Monoecious plants have both male and female flowers on the same plant; the first flowers that appear are male or non-fruiting; fruiting female flowers appear 7 to 10 days after at the end of shoots. Gynecious cucumbers have only female flowers. They require a male flower on a nearby plant for pollination. Cucumbers are pollinated by visiting insects or birds. (Most cucumber varieties are monoecious.)

Sowing and planting. Cucumber seeds will germinate in as little as three days when the soil temperature is 80° to 90°F. Sow cucumber seed indoors about three weeks before setting seedlings into the garden. Start cucumbers indoors in individual pots so that the roots are not disturbed at transplanting. Set out cucumber starts when the garden soil temperature is 70°F or greater. You can speed garden soil warming by covering the planting area with black plastic mulch or by using mounds or raised rows to grow cucumbers.

Spacing. Plant cucumbers in full sun and set bush cucumbers 18 to 24 inches apart and vining varieties at least 24 to 36 inches apart in rows 3 feet apart. Cucumbers like well-drained roots so planting on mounds is a good idea. Set three plants on mounds 3 feet across; space mounds 6 feet apart. Set trellises or pole supports in place before you plant seedlings. To prevent diseases, air circulation around plants is important.

Growing Cucumbers in Your Vegetable Garden

Protection. Cucumbers do not like chilly weather or chilly soil. They will die back with even a touch of frost. When night temperatures fall below 65°F protect cucumbers with floating row covers.

Water. Cucumbers are 96 percent water. For best growth, they require uninterrupted moisture from sprouting to harvest. Water seedlings well, and keep soil moist throughout the season especially when flowering and fruiting. Bitter and misshapen fruit are the result of water stress. To stem moisture evaporation, cover the soil with black plastic or thick compost mulch after planting.

Feeding. Cucumbers are heavy feeders. Add plenty of aged compost or manure to the planting bed in advance of sowing. Before you plant, place aged compost or manure at the bottom of each planting hole and throw in a buffer inch or two of native soil. This will get plants off to a strong start. Apply compost tea or manure tea at transplanting or two weeks after seedlings emerge. Feed again with compost tea in three weeks or when the first flowers appear. When the first fruits set, water each plant with compost tea or side-dress each plant with a shovel full of compost. If leaves are pale, give plants a dose of fish emulsion. But be careful not to give squashes too much nitrogen; nitrogen will increase leafy growth but cut fruit yield.

Prune. Cucumbers easily grow on trellises, cages, fences, or poles. A 4-foot-high wire cage is about the right size. When vines reach the top of the cage, trellis or fence, pinch out the fuzzy growing tip. This will allow plants to spread laterally. Fruits that grow curved on the ground will grow straight when hanging from supports.

Bamboo  Garden Twine Cucumber Trellis - grow vertically

Problems. Cucumbers are susceptible to diseases and pests. Squash beetles and striped cucumber beetles can be regular visitors–feeding at night. (Cucumber beetles are attracted to the bitter compound in the skin of many cucumber varieties.) Handpick these pests in the early morning or plant varieties that don’t have the bitter compound–‘Holland’, ‘Aria’, and ‘Lemon’ are good choices. Cucumbers can also be plagued by wilts and powdery mildew. Plant disease resistant varieties.

Harvest. Harvest cucumbers when they are green, firm, and moderate size. Harvest slicing cucumbers when 6-10 inches long, pickling (sweet pr baby dills when 1-6 inches long, regular dills when 3-4 inches long. The best rule is pick cucumbers as soon as they reach useable size. Cucumbers left on the vine too long will become seedy and bitter. Cucumbers that are dull, puffy, and yellowing are past their prime. A prompt harvest will allow plants to set new fruit. Fruit left to mature on the plant will completely stop the set of new fruit.

Cucumber on vine

Vegetable Seed Sowing Guide

A guide of what to sow, when to sow it and where to sow it. A comprehensive guide that will help you with your vegetable seed sowing throughout the year.

Vegetable Seed Sowing Guide

How to Force Bulbs Indoors

How to Force Bulbs Indoors

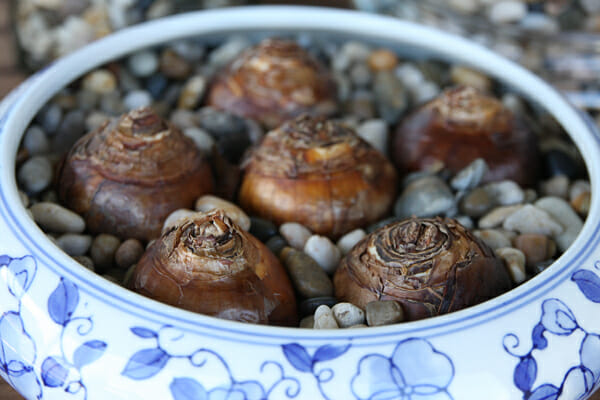
Forcing bulbs is a way you can take garden bulbs that grow outside and grow them inside your house in the cold winter months (or any time really.) 

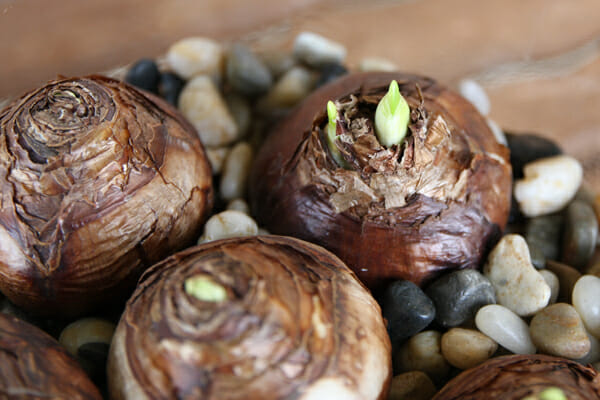
Many bulbs (like hyacinth, tulips and the daffodils I’ve done above) require a chilling period, which complicates things a bit and prolongs the process but one of the bulbs that doesn’t require this are Paperwhites.  In the daffodil family, they grow clusters of little white flowers and they’re the quickest and easiest bulbs to force.  They require very little maintenance and don’t even require a green thumb This is a great project to do with kids too; they will love keeping their eye on these bulbs and cheering at the first sight of roots, tips, and flowers.

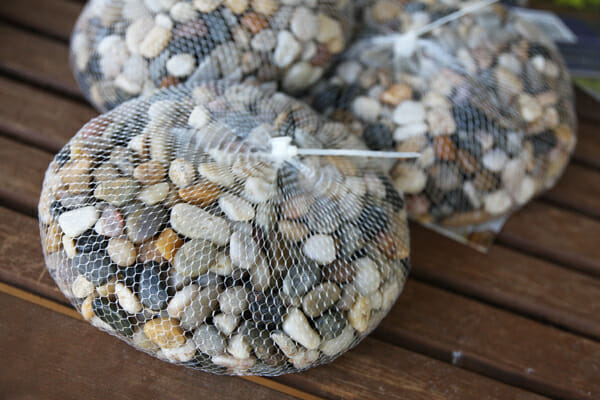
You’ll need a container; and it can be any number of things.  Glass vases work great.  They look really pretty, and the glass makes it easy to monitor the water level.  Once the flowers grow tall, having the glass sides helps the flowers from flopping over. And you can even use baskets and decorative containers if they are lined with a waterproof container on the inside.


Place water in your container, so it’s just barely touching the bottom of the bulb.  You don’t want the bulbs swimming in there or they will rot, so just get it barely close to the bottom.  This is where a glass container comes in handy.  If you’re pouring water into a tall vase, pour it carefully down the side so you don’t splash the tops of the bulbs.

Within a few days, you should notice little roots growing out the bottom.  The roots will find their way to the water, growing around the stones and therefore anchoring the bulbs in place.


Tie a ribbon around an inexpensive glass vase and they make a great hostess gift.  You should see your first blooms within about 4-6 weeks.

Chair Planters

Cut a hole in the seat of an old chair and place a pot of wave petunias
chair planter for the shade

Remove the seat (or cut a hole in it), add chicken wire for a frame to hold your flowers and you’re ready to plant!

Chair planter, I can finally transform that broken kitchen chair cute idea for the back yard dress up the ugly garage
Chair planter, u can transform broken kitchen chair into a cute idea for your back yard dress up

Love this chair as a trellis

Recycled Chair Container Garden #diy #gardening
Recycled Chair Container Garden

Flowering Chair - Go to Bargain Center in Eau Claire to get great deals on furniture that you can make your own and redecorate with
Flowering Chair

a little bit o' Shizzle: Easy Garden Chair Planter http://alittlebitoshizzle.blogspot.com/2012/06/easy-garden-chair-planter.html
Easy Garden Chair Planter

.a blue chair to go with my blue pots - terrific idea
a blue chair to go with a blue pots - terrific idea

Garage sales here I come!  I want to paint something other than the two birdhouses I am currently doing for this spring!  I have three rockers I may just have to whimsically paint!
Cute!