Friday, January 30, 2015
Saturday, January 17, 2015
How to Get More from Your Square Foot Garden with Succession Planting
If you have ever tried square foot gardening, you know that you can grow an amazing amount of food for your family in a few raised beds. However, there are a few things you can do to maximize your limited space. Intense Square Foot Gardening is particularly useful if you are living in an area with a short growing season.
Same Crop Successive Gardening extends the harvest of a type of vegetable. Instead of planting all of the crop at once, as is common in traditional row gardening, make several successive plantings. Make 3 smaller plantings of peas, 7 days apart. Plant 10 – 20 radish seeds every week, switching to a milder radish like Cheriette, when the summer heat is known to intensify the flavor of radishes. Start 4 –6 new lettuce and spinach plants every 2 weeks, and pinch leaves from the inside rather than wait to harvest a whole head. In the spring and fall you can grown any variety, once it gets hot, switch to heat tolerant plants like Buttercrunch and Spinach Mustard, then switch back to Romaine and a compact variety spinach in the fall.

Planting Different Crops in Succession ensures that you maximize your garden space. After you harvest a crop, inspect the soil for harmful insects, replenish the soil with compost, and plant a new crop. This works best when you pair a cool weather crop with a longer season heat tolerant crop (e.g. follow broccoli and cauliflower with squash plants). Or follow a long growing crop like potatoes with a cool weather crop like kale or spinach.

Grow Different Varieties of the Same Plant to extend your harvest time. By planting tomatoes with different maturity dates, you ensure that you have a continuous supply of tomatoes without being completely swamped by plants that all ripen at the same time.

Vegetable Container Gardening

Almost all vegetables can be grown in containers and vegetable container gardening can yield a ton of veggies to boot! One of the best parts of vegetable container gardening is that if a plant isn’t doing so hot in a particular space, you can move it! The hardest part about container gardening is picking out which plants you want to grow and the size of the container to put them in.
Vegetable Container Gardening
There are a few key things to remember when picking out containers for your vegetable garden. If you live in a very hot climate, make sure to choose hard plastic over soft as the heat transfers quickly to the plant’s roots and can fry them. It is best to use thick plastic, Styrofoam, terra cotta or ceramic containers if you are battling extreme heat. Same thing if you are gardening on a rooftop or balcony – you will want to stick with materials that are lighter rather than something heavy like a big clay pot.
Before you pick out your vegetables make sure your containers have good drainage hole, at least 3-4 on the bottom with a layer of rocks on top. Next add in a good potting soil that you have added bone meal, blood meal, and earthworm castings to. Since you are gardening in such a small space those plants need to be able to uptake as many nutrients as they can. You will want to add this same mixture as the soil line goes down over time.
Choosing the proper container for the type of plant you have is essential. Look to plant vegetable container gardens in pots that are least 10 inches wide and 12 inches deep. Large flowerpots, half barrels, window boxes and planters, plus large containers such as 5-gallon buckets work best. Use large 25-gallon pots for either dwarf citrus trees like Meyers Lemon and even a 5-gallon painter bucket is the perfect size to grow vegetables like tomatoes or squash. Grow root vegetables like carrots and radishes in a deep 10-15” tall pot.


Here is an easy chart to help to know what size container to use and whether you should direct seed or transplant an already grown seedling.
Vegetable Container and Instructions
Beets Direct seed into a 2-5 gal container
Broccoli 1 plant per 5-gal container
Cabbage 1 plant per 5-gal or if a small sized varieties, 1 plant per gallon container
Carrots Direct seed into a 2-5 gal deep container and thin to 3 inches apart
Cucumber 2 plants per 5-gal container. If using vining types, grow on trellis or cage.
Eggplant 1 plant per 5-gal container
Green Beans Sow directly into a 5-gal container
Lettuce Direct seed or transplant into 1-gal or larger container
Pepper 2 transplants per 5-gal container
Spinach Direct seed into 1-gal or larger container and thin to 3 inches apart
Squash Direct seed or transplant, two plants per 5-gal container
Tomatoes Transplant 1 plant per 5-gal container
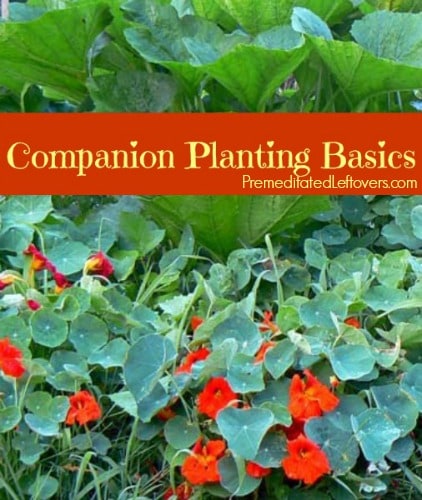
Companion Planting Basics – How to Use Companion Plants in Your Garden

Just like with people, plants have their best friends – you know, those other plants that they like to grow old next to. When you grow certain plant combinations together they have surprising powers to help each other grow and thrive in the garden.
Companion planting works in a few different ways. For instance, tall plants provide shade for sun-sensitive shorter or even vining plants. Companion plants can also prevent pest problems. Plants like onions and marigolds repel a lot of different pests and other plants like Nasturtiums can lure them away from more desirable plants. Another great example of companion planting is attracting beneficial insects like butterflies and bees to the yard by planting butterfly bush or trumpet vines.
Great Combinations of Companion Plants
Corn and Green Beans: One of the oldest companion plantings is with corn and beans. The green beans grow up the corn stalks keeping them off the ground and the beans attract beneficial insects that prey on corn pests. A beautiful friendship was born!
Cucumbers and Nasturtiums: Both plants love to vine out and attract many pests. Nasturtiums are great in salads and have a peppery taste – they also are one of the biggest pest attractors in a garden. They are great to grow with cucumbers so the insects will eat the nasturtiums and leave the cucumbers alone.
Roses and Chives: Gardeners have planted garlic with rose bushes for hundreds of years. Garlic repels pests that eat the rose petals. Garlic chives are also a good repellent and I love them because their white and purple blooms look great at the base of the rose bush.
Tomatoes, Cabbage & Dill: Tomatoes are a natural repellent to the diamondback moth larvae, which are huge caterpillars that chew large holes in cabbage leaves. It is best to grow tomatoes on all sides of the cabbage patch and next to the plants to keep the caterpillars at bay. Any plant in the cabbage family such as broccoli and Brussels sprouts helps keep the dill upright and the dill attracts tiny beneficial wasps that keep cabbageworms at bay.
Radishes and Spinach: Plant radishes among spinach plants to lure leafminers away from the spinach. Since the leafminers don’t do damage to the radish itself, just its leaves, this is a great compromise in the garden.

Potatoes and Sweet Alyssum: One of the best smelling plants in any garden is sweet alyssum. Its tiny flowers attract many beneficial insects. Plant sweet alyssum beside potatoes, or on the edges if growing in a container, and let it spread. The potatoes grow pest free underneath the ground and you get a wonderful scented garden all year long.
These are just a few of the best companion planting combinations, but there are many more. Learning companion planting combinations will help ensure a garden working together and producing beautiful flowers and a bounty of fruits and vegetables.


How to Make Raised Beds From Pallets

Most of the information you'll find about using pallets to build raised garden beds involves taking them apart and using the lumber to start from scratch. These ideas all work well for someone who is handy, and who has access to tools and the space to work in. However, those who aren't so fortunate or so handy can still use the pallets as they are to make raised gardening beds.
1
Select pallets stamped with the letters "HT," which indicates that they have been heat-treated, and not treated with chemicals that can leach into the soil and contaminate plants meant to be consumed such as herbs, vegetables and fruit.
2
Prepare pallets with solid deck boards by using a prybar or hammer to remove every other board, and set these aside to be used for other projects. Leave pallets with open spaces in their decks as is, as they provide instant spacing between garden rows.
3
Prepare the area for the raised beds by removing as many weeds as possible, and make it as flat as possible. Use a garden spade to remove all stones that may create an uneven surface, level any raised spots, fill in depressions, and rake the entire area smooth and flat to provide a solid base for the pallets.
4
Combine equal parts soil with equal parts compost in a wheelbarrow or bucket. Use the mixture to fill in the spaces between the deck boards, packing it into all visible spaces until it is spilling out over the top and sides.
5
Sweep the top of the pallets to redistribute any remaining stray soil into the spaces, and pat it down with your hands. Pull the soil on the open ends back to bank it against the pallet, but do not block it with anything, as this will provide drainage for the garden.
6
Plant seeds or seedlings in the soil in the open sections between the deck boards, spacing them the same distance as recommended for planting in a traditional garden.
Other samples of raised bed from pallets:


How to Start Square Foot Gardening

Have you ever wanted to grow a large vegetable garden but don’t necessarily have acres of land to work with? Most gardeners don’t know that you can grow a ton of veggies in a small amount of space using the square foot gardening method. The Square Foot Gardening concept is one of the easiest ways to grow an herb and vegetable garden in a raised bed.
How to Start Square Foot Gardening
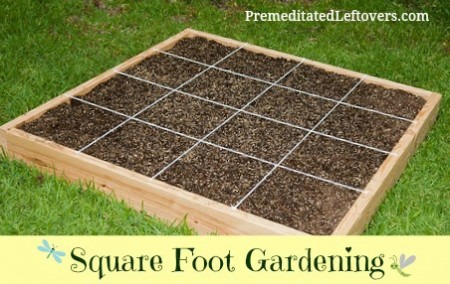
First, you have to build out a large square. Using 6-inch wide untreated lumber works the best, but any material can be used. Make sure to put down a weed barrier so weeds and grass don’t grow up into the raised bed. The best size for a square foot garden is 4×4 feet. You can be creative though in your design, but 4 feet across is best for adults and 3 feet for kid’s gardens as their arms just can’t reach that far. Here are some of the raised bed garden ideas.


The soil that you put into your square foot garden needs to be full of nutrients and is best when it is a blend of different materials. Here is a great garden soil recipe for your raised bed: Equal parts of potting soil or compost, vermiculite, and peat moss. For the potting soil, I often will mix a few different types together with compost to give a good variety of nutrients to the mix. Make sure to water down this mixture until you can squeeze a handful of it and no water drips out – that’s how you know that it has been completely absorbed.
Once you have the soil in the planter box, add a 12” grid on top using tape or string, so you know where to plant.
Guide to help you know how many plants go into each square:
Small: 16 plants per square for 3” spacing
Medium: 9 plants per square for 4” spacing
Large: 4 per square for 6” spacing
Extra Large: 1 per square for 12” spacing
Use the seed packet as a good guideline to know how many seeds to put into a square. Many people love to grow tomatoes and since they are heavy nutrient eaters, one per square works best. The same goes for pepper and squash plants. Smaller plants like radishes and carrots can have 16 per square, sometimes more depending on the varieties chosen.
There is very little weeding that needs to be done using the square foot gardening method. If you want a natural way to keep pests out of your garden, plant a few marigolds in the squares with the other plants as they are a natural pest deterrent – this is also called companion planting. Another great companion planting is to plant corn and green beans together and let the beans grow up the corn stalks instead of having to stake them. I will also plant garlic throughout my raised beds as they keep away a lot of bugs too!
Experiment with your square foot garden and try different plants together. This concept of gardening is a lot of fun to do and easy to get the whole family involved in!
Frugal Gardening Tips: How to Start a Garden on a Budget

You may have heard that gardening and growing your own food is one way you can save money. If you are really looking to save, but in a financial bind, the idea of starting a garden seems like it might be an expensive endeavor. The good news, it doesn’t have to be and if you have even a very small budget to work with, you can get a garden going.
How to Start a Garden on a Budget
Be resourceful. Don’t think you need to buy all new equipment or even things made specifically for gardening. If you are going to need a trellis, for instance, look in the free ads. Many times, there are scraps of chicken wire, bed frames and other “garbage” that can be used in the garden. Don’t have pots? Why not recycle things that you already have at home.

Be neighborly. Ask if you can borrow a neighbor’s equipment if they have extra trowels, hoes, rakes or shovels. In exchange, promise them some of your bounty come harvest time. You could even decide that you could grow some of one kind of vegetable and your neighbor grows a different type and you trade and share.

Make your own compost to feed your garden. This does not have to be a huge bin in your backyard if you do not have the space. You can compost with just kitchen scraps and worms in a small, sealed container in your kitchen. Not only is this pretty much free (other than the cost of the container), but it will give you great results as it is pesticide free and organic compost rich in minerals for your plants.
Don’t raise your water bill. Instead, collect the rainwater that will fall this spring in barrels to use to water your garden with. You may not get an entire season of gardening out of it, but it will reduce the costs.

Plant what you already buy. Some plants, such as onions, scallions, celery and some types of lettuce regrow by simply replanting the roots. If you are going to buy them from the store anyway, you might as well have them reproduce. You might need to start new roots, though. To do this, just place the item where the roots are down into water and wait a couple days. Green onions are ready to plant in just 3-4 days.

Use vinegar to keep weeds away. Spray weeds directly with plain distilled vinegar to act as a weed-killer. Use care on where you spray it, though, as it can kill some of the plants you are trying to grow as well. To keep cats and many kinds of pests out of your garden, try sticking orange peels near your plants.

Look for other avenues to get seeds for cheap. You can often buy them online for very low cost and you might even have a friend or neighbor that has some saved from last season. Also, there are seed swapping groups online and some local. Look there for gardeners who may be willing to help you get started.
Subscribe to:
Comments (Atom)


